
Releases
Unlock Enhanced System Management with VitalPBX 4.1.0 R1
The VitalPBX team is thrilled to announce the rollout of VitalPBX 4.1 R1, a significant update that brings cutting-edge features and improvements to your communication

Read our tutorials and guides on how to implement new tools and technologies for your business with VitalPBX here.
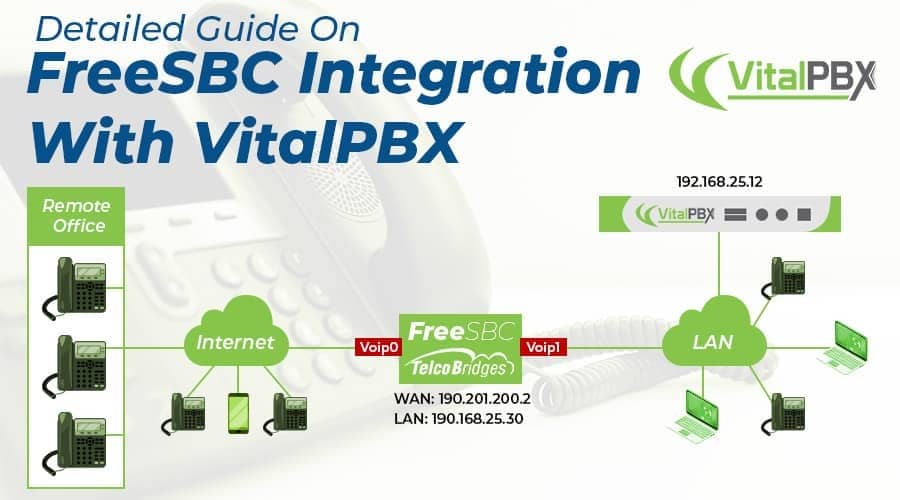
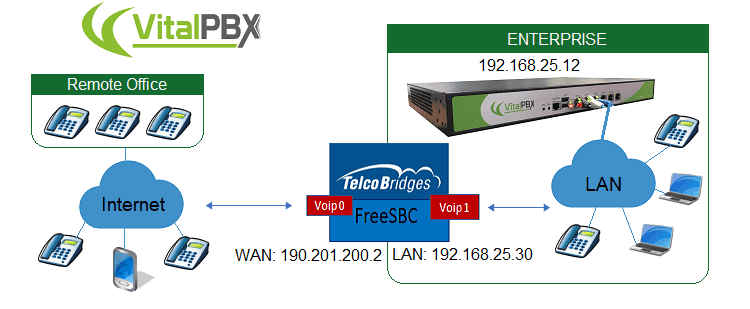
A Session Border Controller is a device used in select VoIP networks to exert control over the signalling and usually also the media streams involved in setting up, conducting, and tearing down calls. The SBC enforces security, quality of service and admission control mechanism over the VoIP sessions.
The Session Border Controller is often installed in a point of demarcation between one part of a network and another. Most Session Border controllers will be installed between peering service provider networks, between the enterprise network and the service provider network, or between the service provider network and residential users.
Go to the following link to install FreeSBC:
Install FreeSBC
For the FreeSBC Initial configuration go to this link:
FreeSBC Initial Configuration
At the beginning of the session in our SBC we will see that there is a message in yellow that tells us that we have a No valid license, this is why we must load the license.
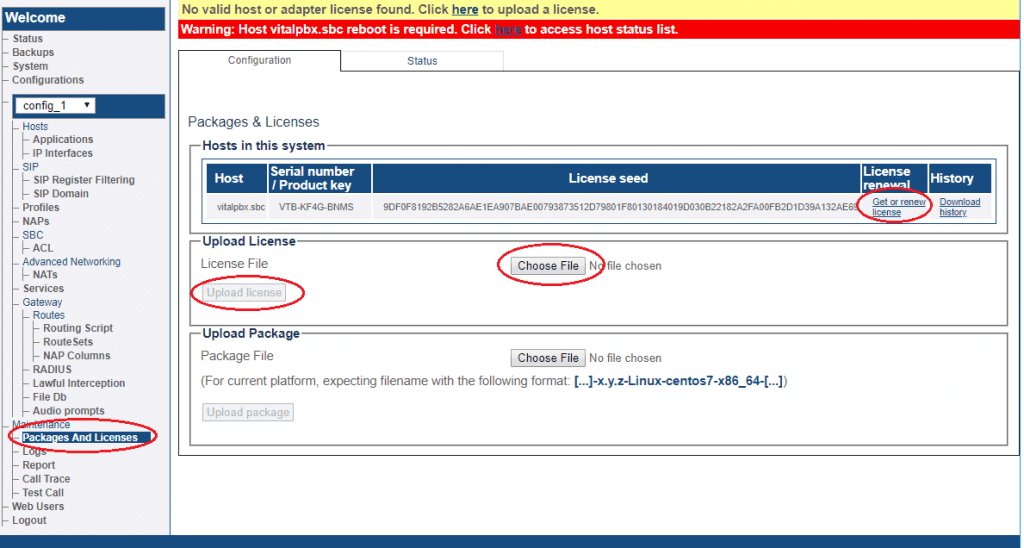
Follow the following procedure:
1.- Go to Maintenance/Packages And License.
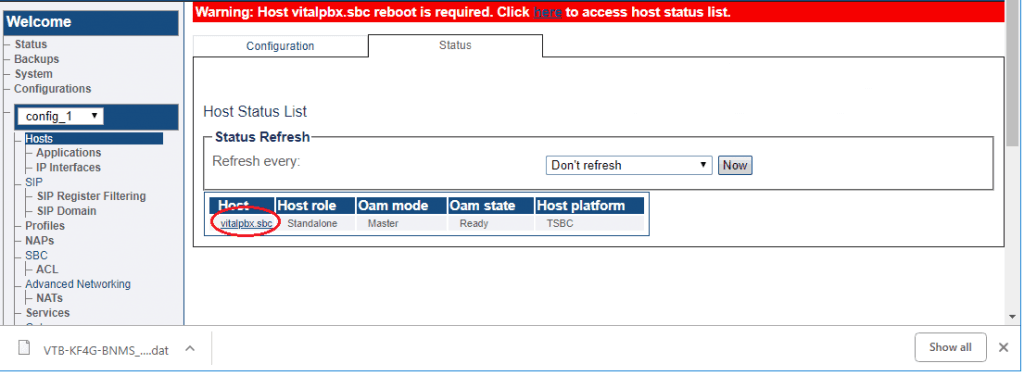
2.- Now we will proceed to restart the computer

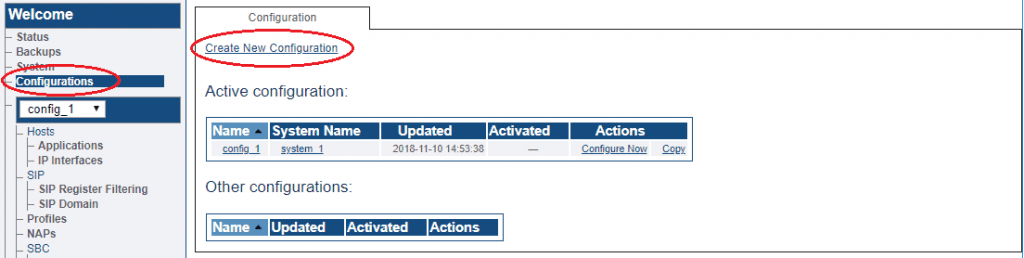
1.- Go to Configurations menu and click Create New Configuration
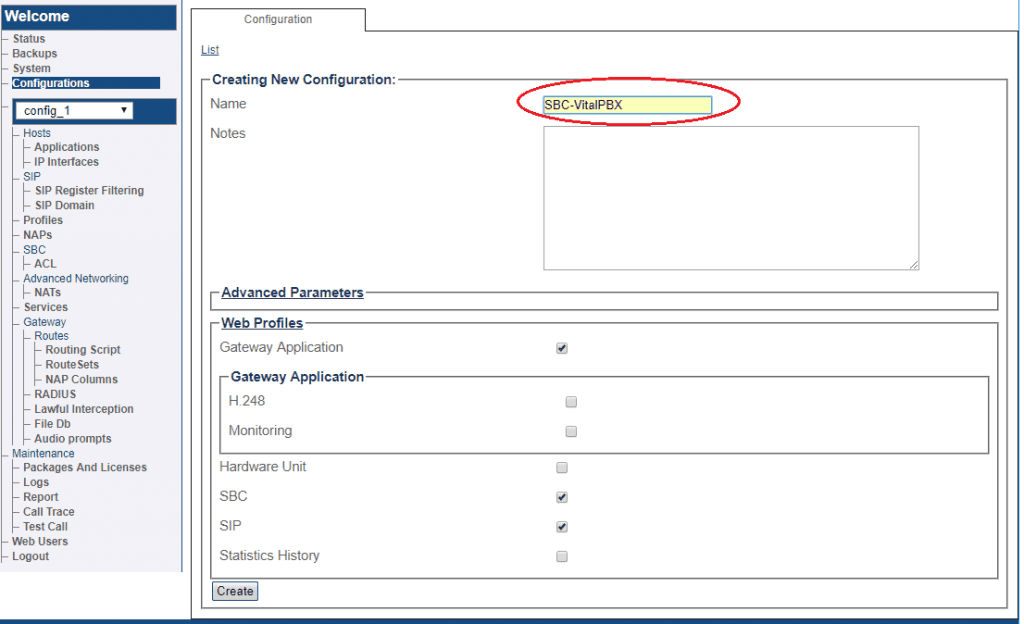
2.- Now create the configuration
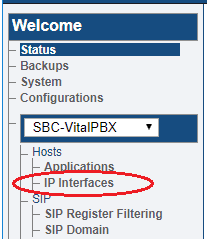
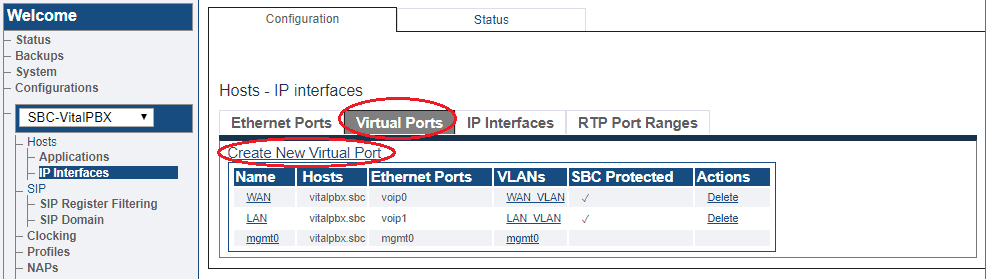
1. Select IP Interfaces from the navigation panel
2. Click the Virtual Ports tab.
Click Create New Virtual Port

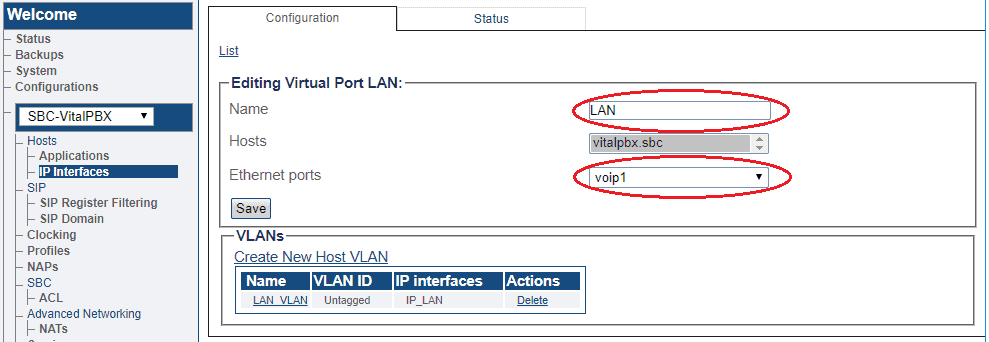
3. Configure the virtual port.

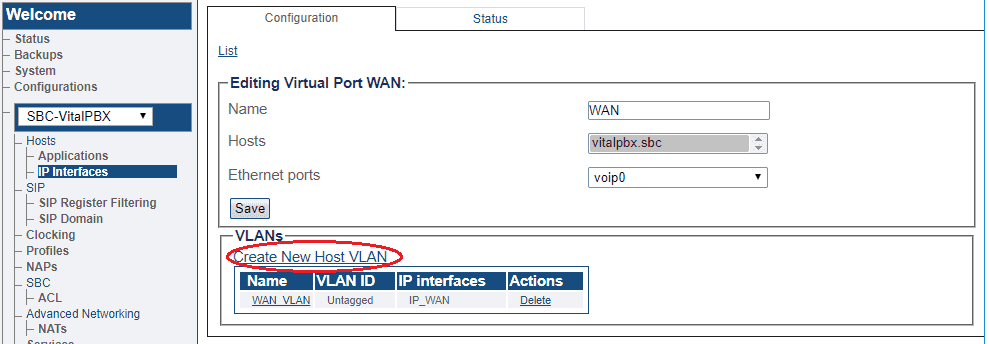
4. Create a VLAN that uses this virtual port
Click Create new Host VLAN
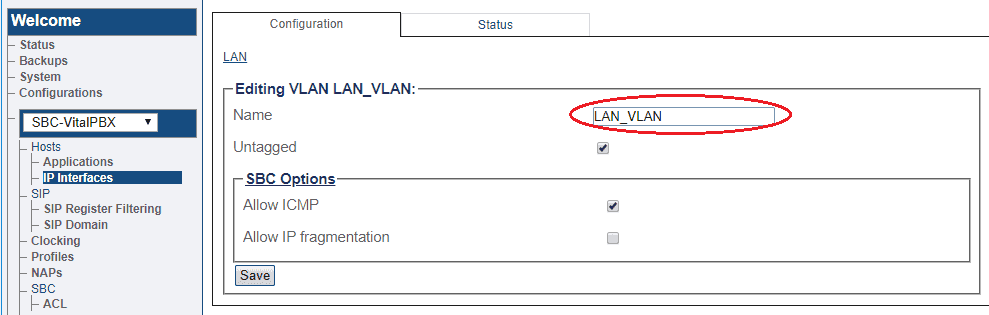
5. Configure the new VLAN
1. Select IP Interfaces from the navigation panel
2. Click the Virtual Ports tab.
Click Create New Virtual Port
3. Configure the virtual port.
4. Create a VLAN that uses this virtual port
Click Create new Host VLAN

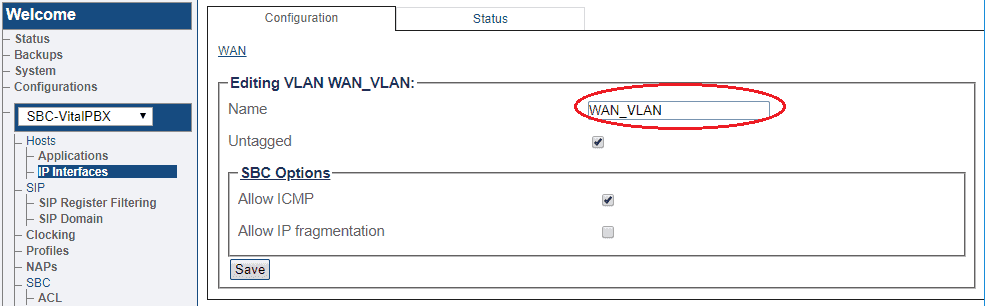
5. Configure the new VLAN
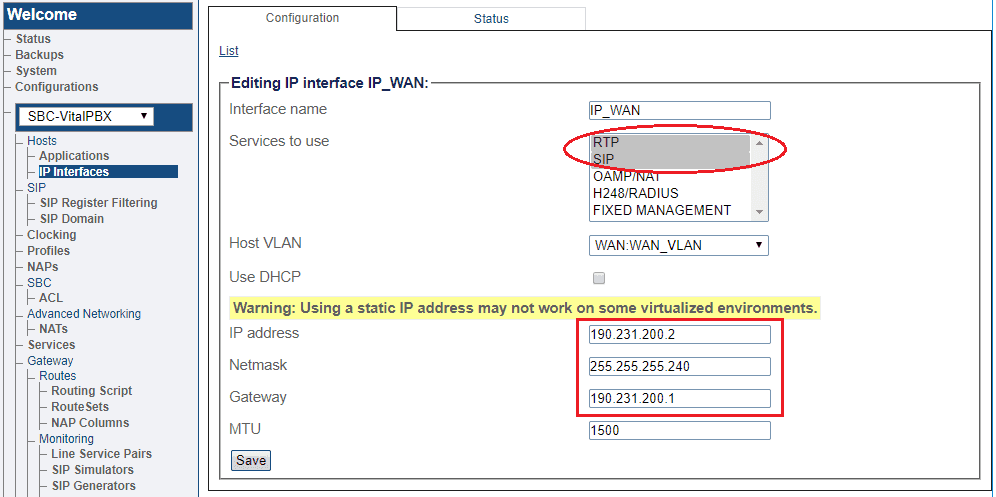
1. Select IP Interfaces from the navigation panel
2. Click the IP Interfaces tab.
Click Create New IP Interface
3. Configure the IP interface
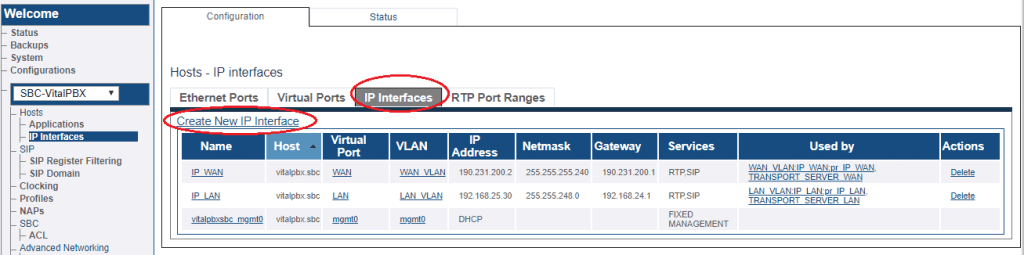
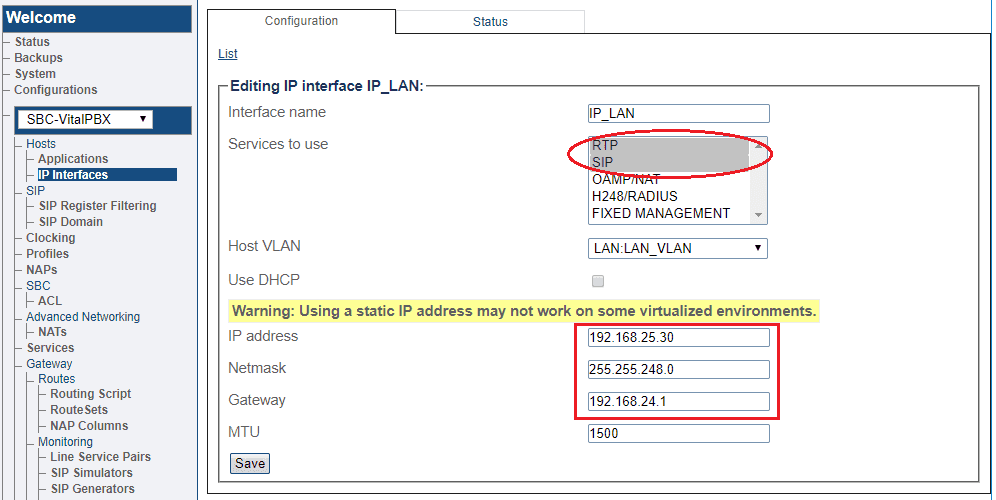
1. Select IP Interfaces from the navigation panel:
2. Click the IP Interfaces tab.
Click Create New IP Interface
3. Configure the IP interface:
You must configure SIP signalling for your system. The first step in doing so is to create a SIP stack:
1- Click SIP in the navigation panel
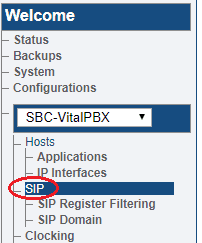
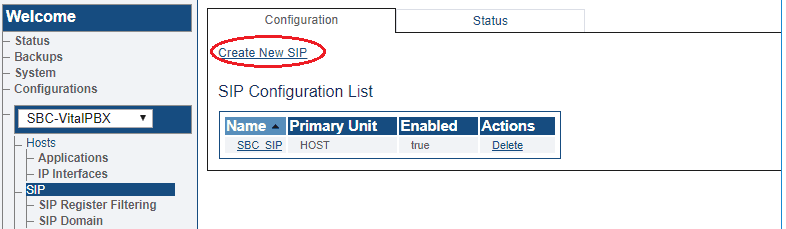
3- Create the new SIP stack
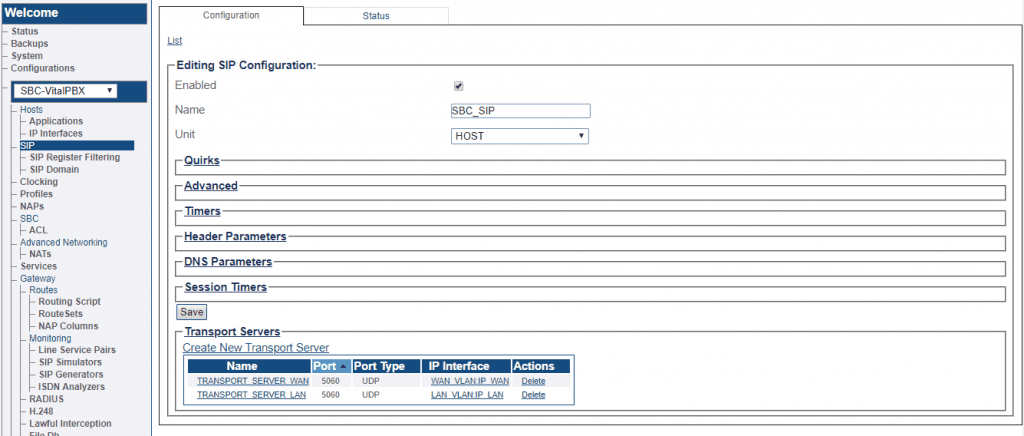
1- Select a SIP stack for which you wish to create a transport server
2- Click Create New Transport Server
3- Create the new SIP transport server
1- Select a SIP stack for which you wish to create a transport server
2- Click Create New Transport Server
3- Create the new SIP transport server
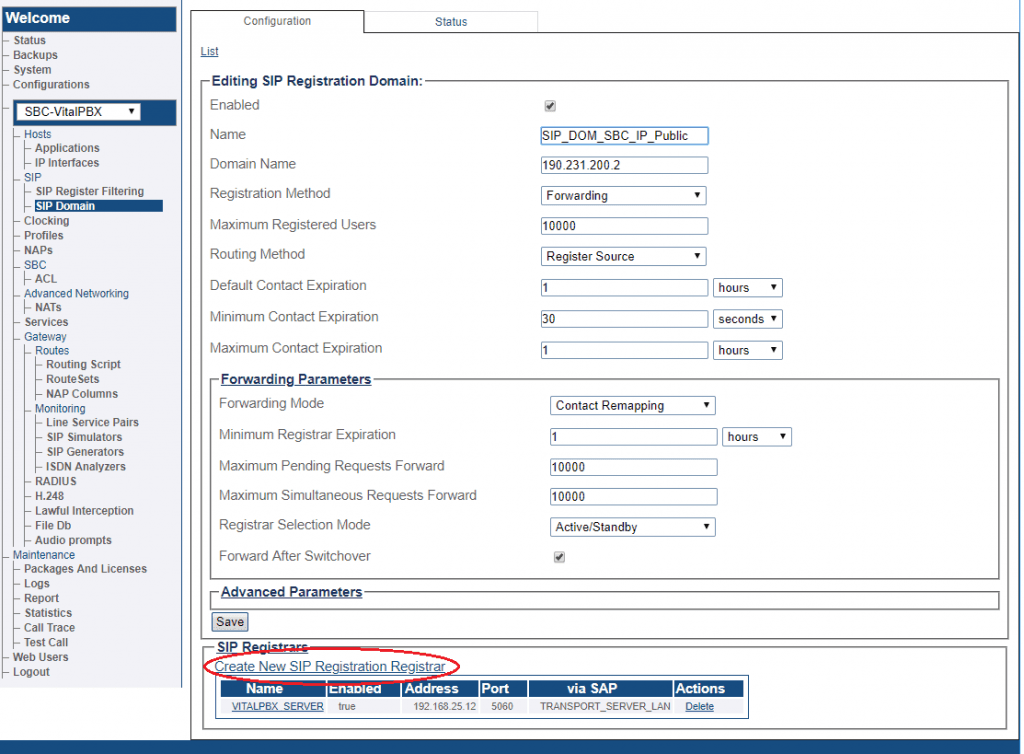
A SIP domain represents a grouping of devices (or users) that can communicate with one another. You must configure SIP Registration Domain for your system. The first step in doing so is to create a SIP Domain:
1- Click SIP Domain in the navigation panel
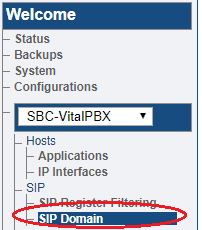

3- Create the new Domain
Forwarding Parameters
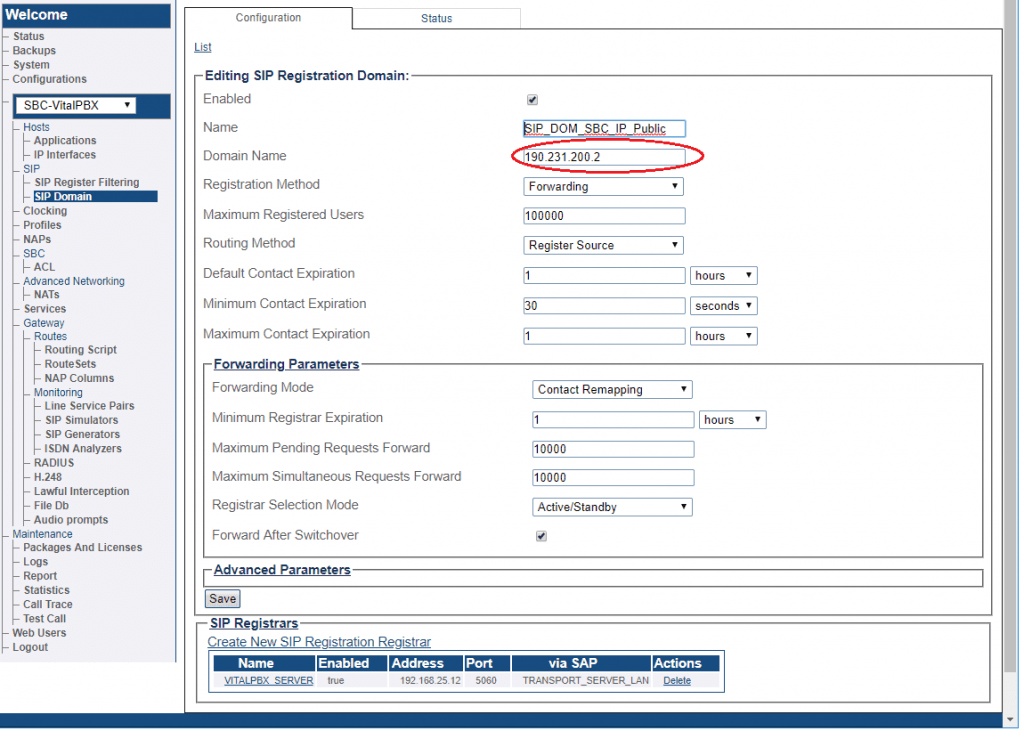
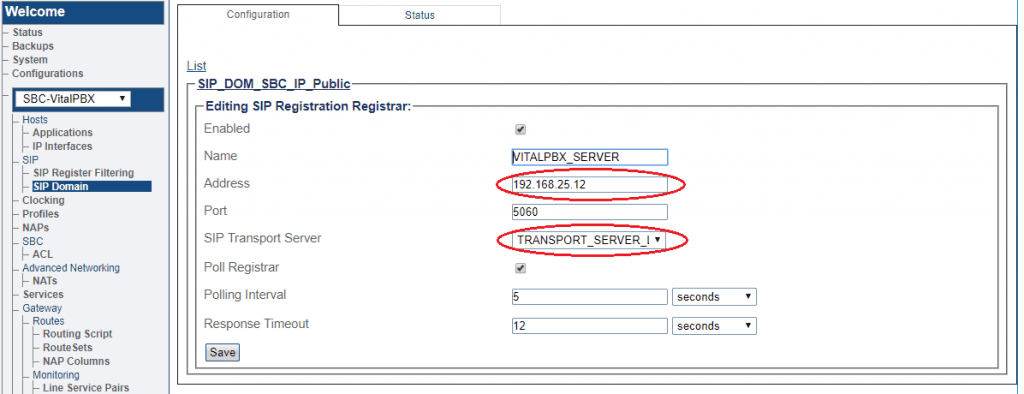
A SIP registrar represents a SIP endpoint that provides a location service. You must configure SIP Registrar for your system. The first step in doing so is to select your SIP Domain:
1- Click Create New SIP Registration Registrar
2- Create the new SIP Registration Registrar
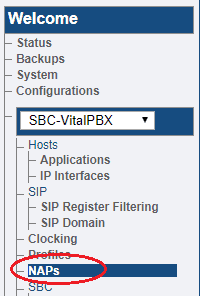
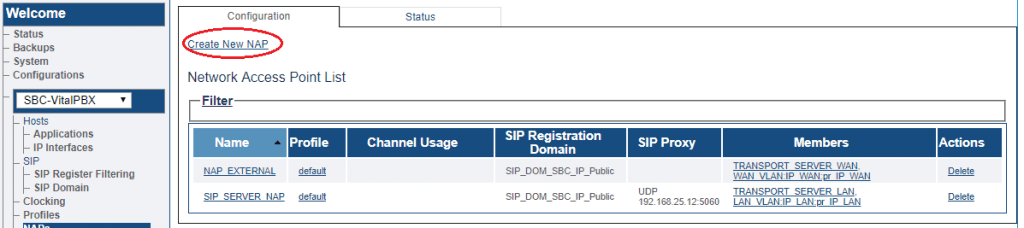
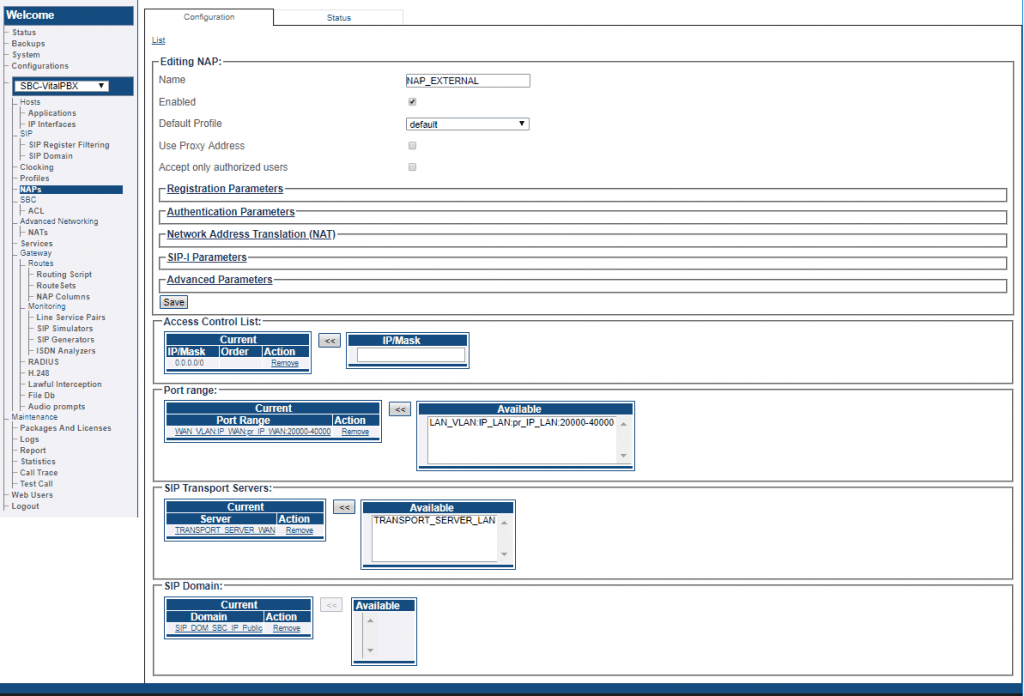
A Network Access Point or NAP represents the entry point to another network or destination peer (e.g. SIP proxy, SIP trunk, etc)
To create a new NAP:
1- Click NAPs in the navigation panel
2- Click Create New NAP
Click Create
2. Then Configure the following parameters as shown below and click Save
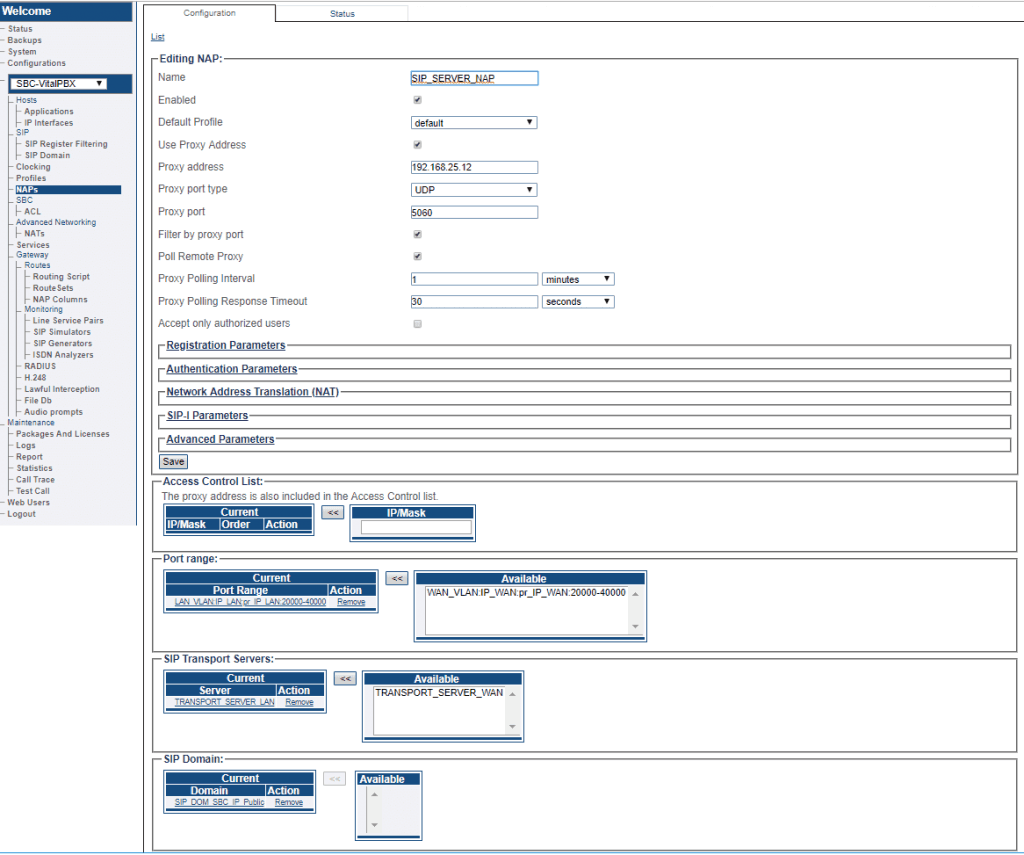
To create a new NAP:
1- Click Create New NAP
2. Then Configure the following parameters as shown below and click Save
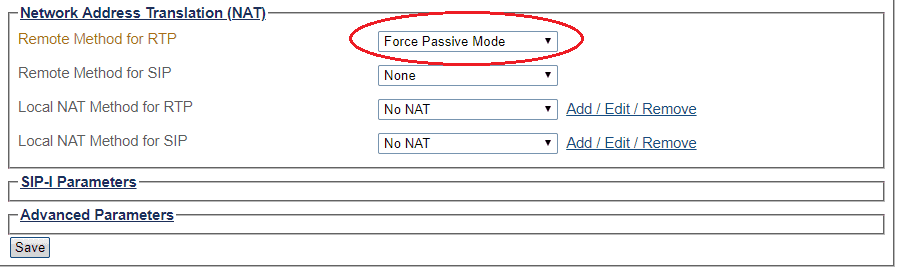
If you have audio problems, configure in Network Address Translation (NAT) section the option:
Remote Method for RTP: Force Passive Mode
In both configuration
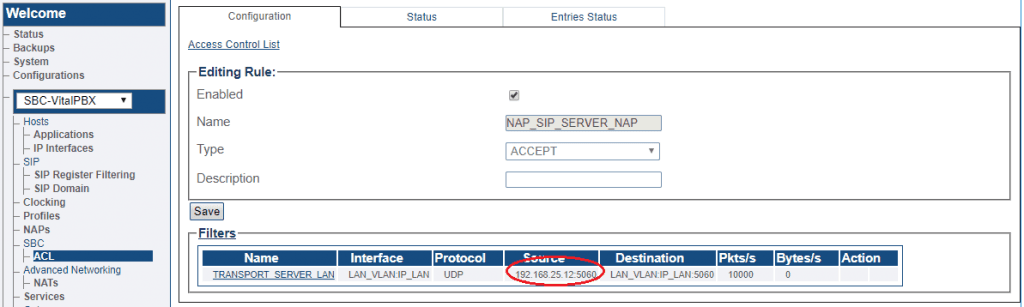
FreeSBC will automatically create Access Control List for each NAP you created.
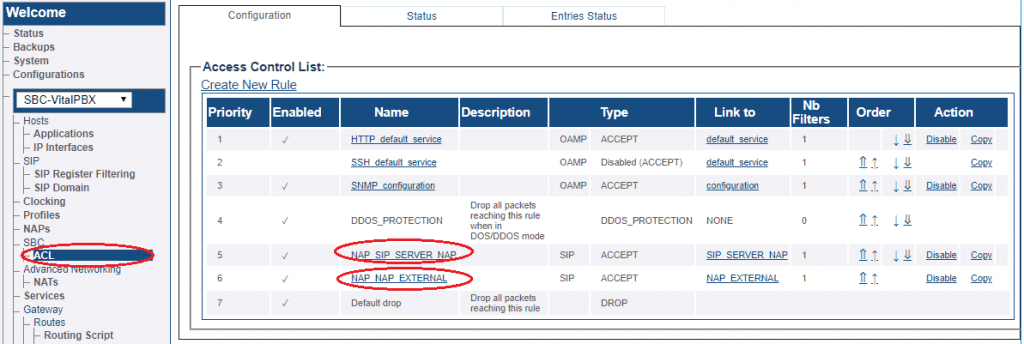
If you double-click one of the created ACL, you will see FreeSBC only accept the calls if source IP matches. In this sample; the calls from 192.168.25.12 will accepted only.
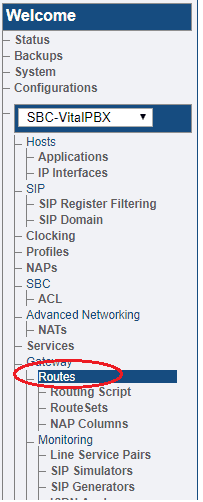
You must set up call routing for your system. Call routing refers to the ability to route calls based on criteria such as origin, destination, time of day, service provider rates, and more.
1- Click Routes in the navigation panel
2- Click Create New Static Route
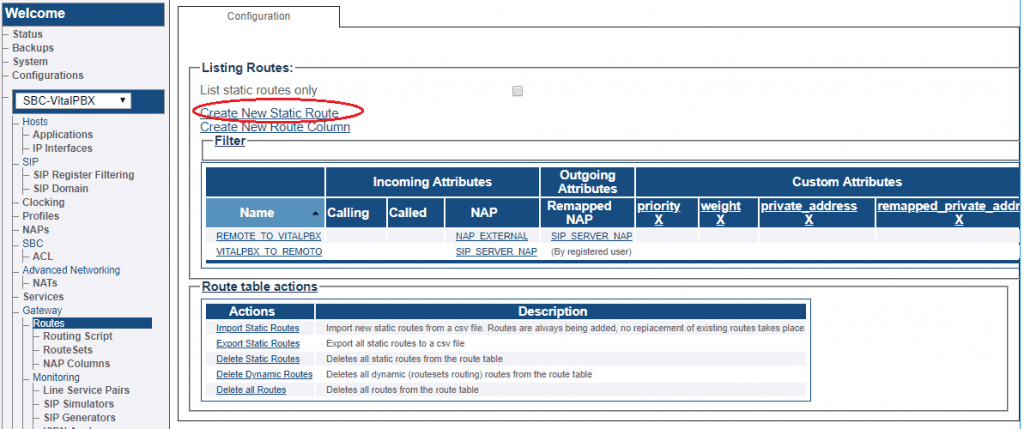
3- Create the new route:

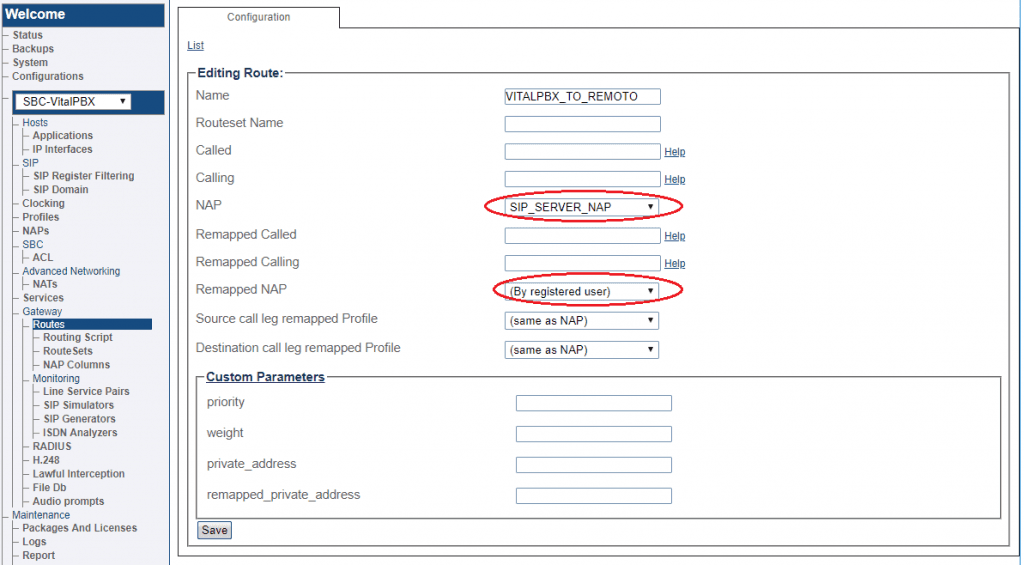
1- Click Create New Static Route
2- Create the new route:
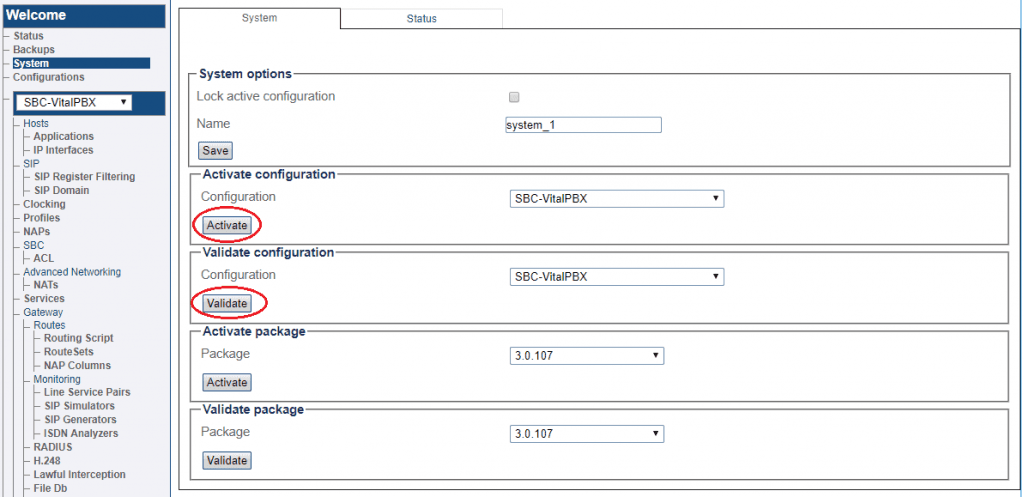
After having completed all the configuration you have to go to System and Apply the Changes
Now register your phone to the Public IP, which in our example is: 190.201.200.2
Notes:
Many thanks to TelcoBridge for providing us with all this information and also for allowing the community to have access to an efficient and easy to configure SBC solution.
Learn more about VitalPBX, our services and how we can help you achieve your goals in our official website.
The VitalPBX team is thrilled to announce the rollout of VitalPBX 4.1 R1, a significant update that brings cutting-edge features and improvements to your communication

PBX System Recognized for Industry Innovation Miami, Florida, 02/27/24 — VitalPBX announced today that TMC, a global, integrated media company, has named VitalPBX Unified Communications

Introduction The Private Branch Exchange, or PBX, has been a fundamental pillar in business communication for decades. As technology has advanced, so have the capabilities