
Releases
Exciting Product Updates to Enhance Your Communication Systems: 4.1.0 R2
We’re thrilled to share a series of updates and improvements we’ve rolled out to ensure that your experience with our communication solutions is not only

With the aim of documenting how to integrate different VoIP providers with VitalPBX, today, we will talk about IDT Express, a division of IDT Corporation focused on delivering wholesale Voice and DID services from small to medium size businesses across the globe.
For testing IDT Express’s services, they give you a $25 trial, with this, you can buy a DID to perform or receive calls, so, you will be able to test all of its features before deciding to work with them or not.
Read our tutorials and guides on how to implement new tools and technologies for your business with VitalPBX here.
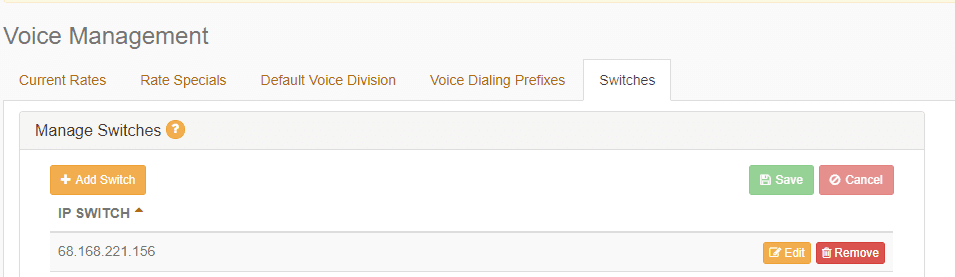
Something important to notice about this provider, is that it only works with IP authentication, so, the first thing you must do is to add on the switches section (Voice >> Switches) your PBX’s IP address.
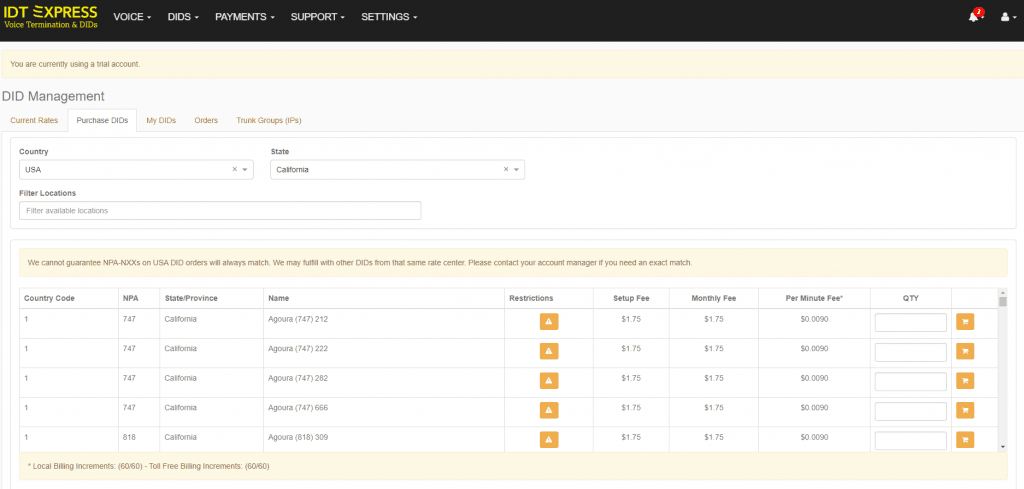
The second step we need to perform is to purchase a DID number to receive and make calls, just as it is shown on the picture below. Once we have purchased the DID number, we must wait until the DID is available on the “My DIDs” section (DIDs >> My DIDs).
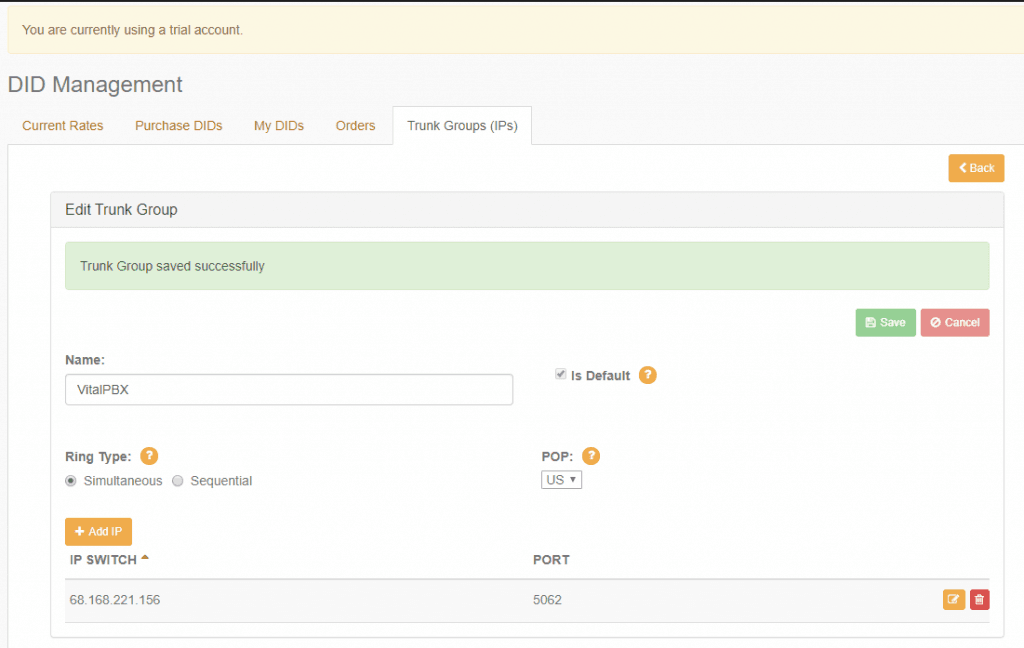
To finish the configuration on the IDT Express portal, we will edit the trunk group assigned to the DID we have just purchased, and configure it with our PBX’s IP and the PJSIP port, as shown on the picture below.
To configure the trunk with this provider, we will use PJSIP, due that this new version of the SIP protocol has new features that can make our lives easier during the configuration of providers that have multiple originating and terminating IP addresses. So, we don’t need to create multiple trunks the way we once did with SIP.
In the case of IDT Express, we have two termination IPs (216.53.4.1, 66.33.147.149), so, we will use the contacts parameter on PJSIP trunks to define this IPs. Let’s check how our trunk must look like, in the picture below.
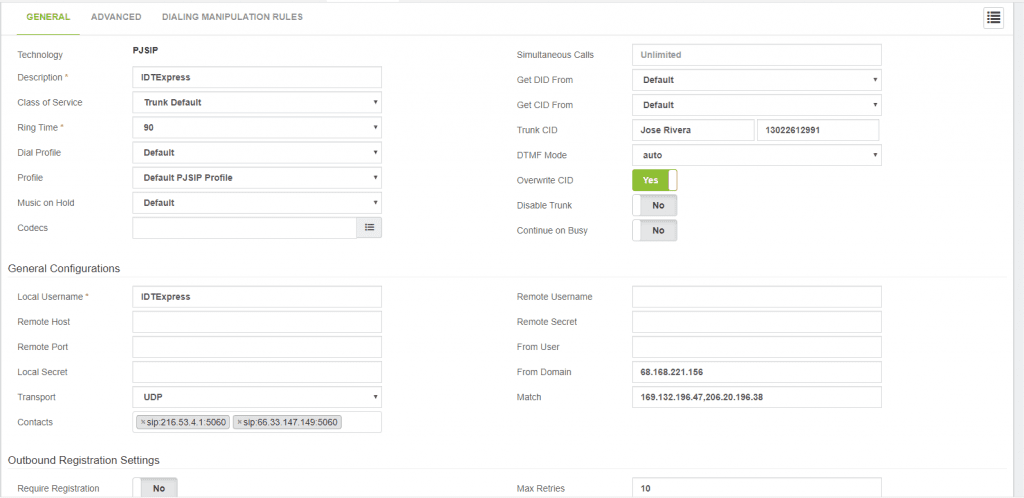
Something important to consider is that we have made this tutorial using VitalPBX 2.3.9, a release candidate version that we have launched a couple of days ago, and, that includes many improvements on PJSIP trunks.
This is the list of parameters we have configured in the trunk:
With just those parameters above, we have successfully connected our VitalPBX with IDTExpress VoIP provider.
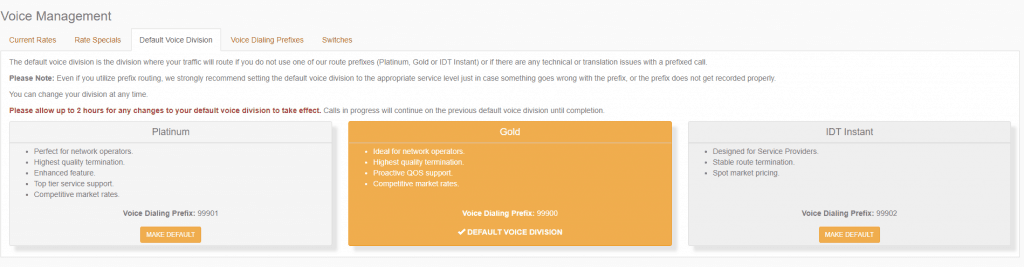
IDT Express has a unique way for routing calls, because it comes with a feature called “Voice Divisions”. These voice divisions are different dialing prefixes that you may use to define what rates, and settings must be applied to your call. The available voice divisions are: Platinum, Gold, and, IDT Instant.
To configure these different voice divisions on our VitalPBX, we must create an outbound route as shown in the picture below.
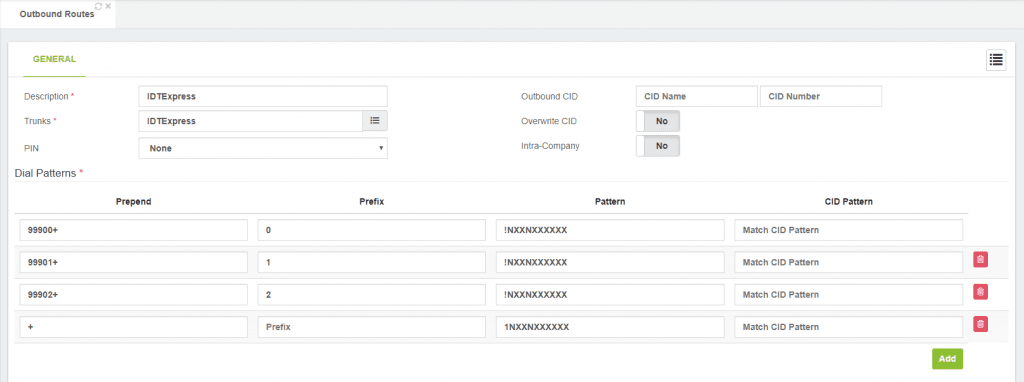
With the dial patterns defined above you may dial any number in the following ways:
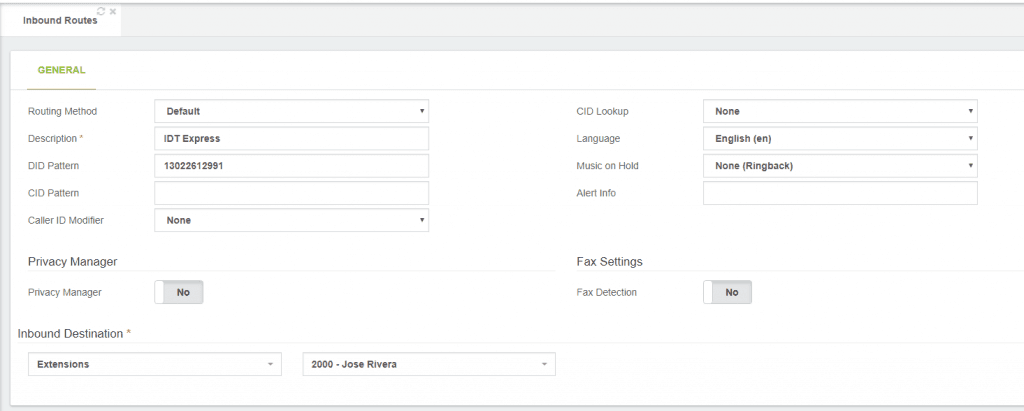
For finish, we are going to configure our DID (the one we’ve purchased at the beginning of this tutorial) on VitalPBX’s inbound routes, as shown in the picture below.
As you may see, IDT Express has a simple way to be configured with VitalPBX, some interesting features and a clean, and friendly user portal.
We hope this tutorial may help you on future implementations where you want to implement or try this VoIP provider.
Get to know about VitalPBX, our services and how we can help you achieve your goals in our official website.
We’re thrilled to share a series of updates and improvements we’ve rolled out to ensure that your experience with our communication solutions is not only

The VitalPBX team is thrilled to announce the rollout of VitalPBX 4.1 R1, a significant update that brings cutting-edge features and improvements to your communication

PBX System Recognized for Industry Innovation Miami, Florida, 02/27/24 — VitalPBX announced today that TMC, a global, integrated media company, has named VitalPBX Unified Communications