Skyetel SIP Trunk with VitalPBX- Fast Comprehensive Guide

VitalPBX Skyetel Integration

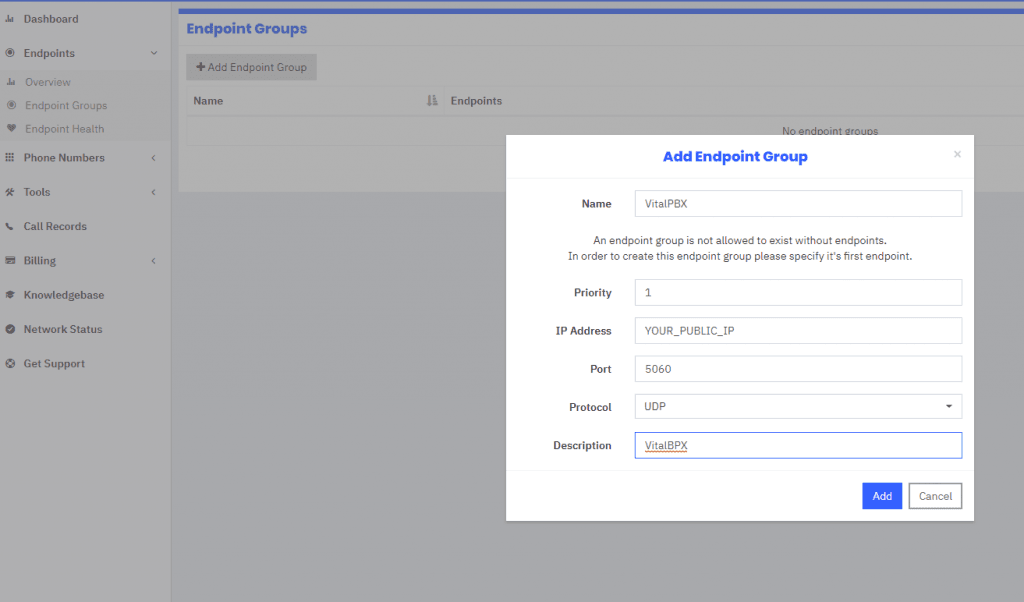
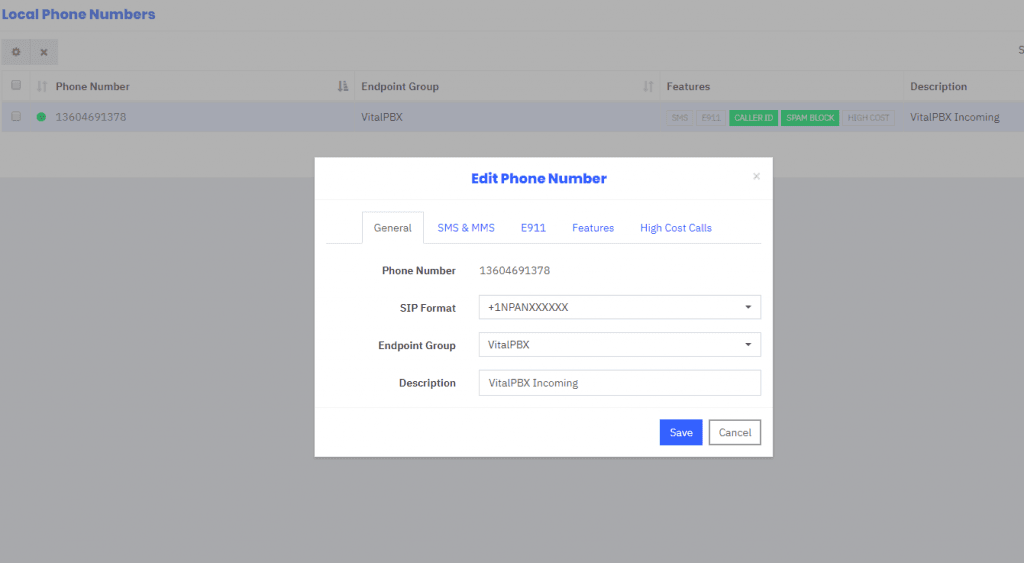
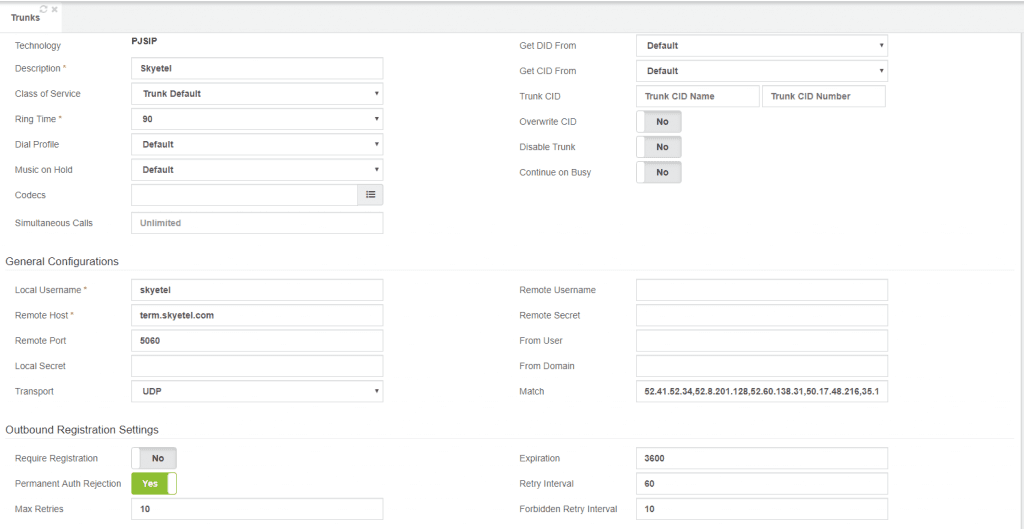
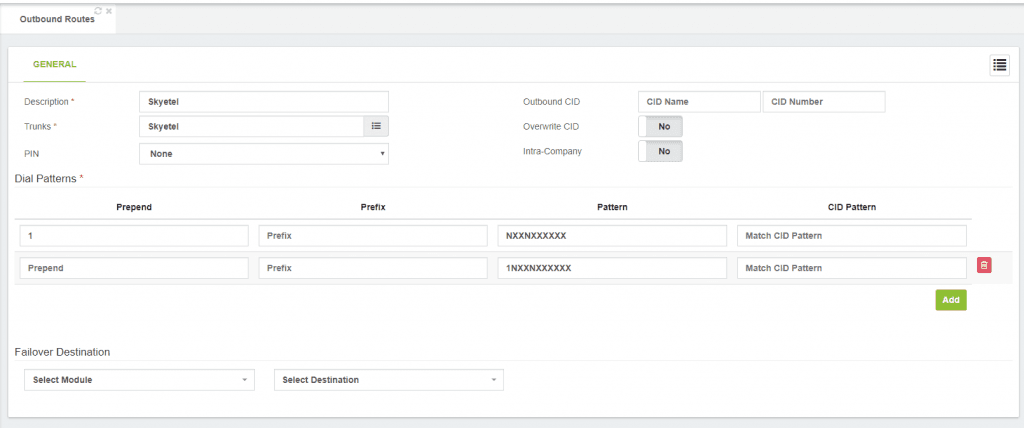
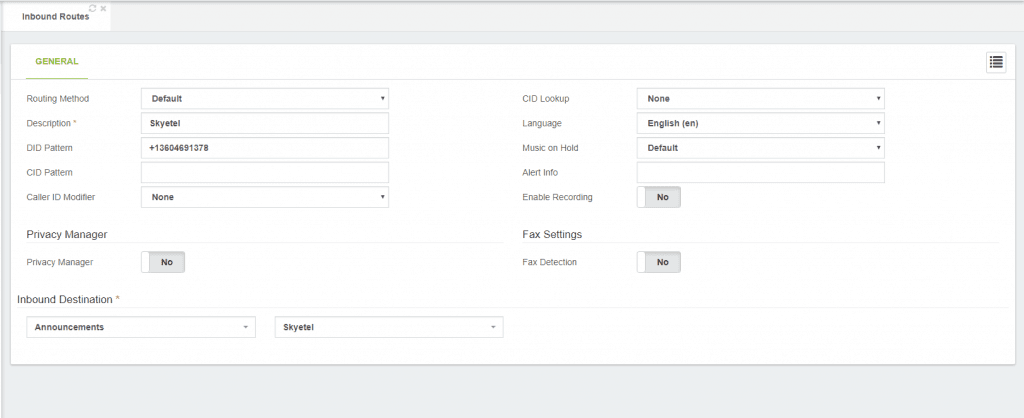
In order to make the configuration of VitalPBX with different VoIP providers easier, today we are pleased to introduce Skyetel, a VoIP provider located in Vancouver, WA. They got amazing features (CID Lookup, VoIP Redundancy, Recordings, Fraud Prevention, etc) and affordable pricing.

Up next, we will list the required steps for connecting Skyetel with VitalPBX to make and receive calls.

Read our tutorials and guides on how to implement new tools and technologies for your business with VitalPBX here.

Set-up

  • First, we need to create a Skyetel account, here will be asked for the Account Info, Organization Info and finally the payment info.
  • Once we have finished creating our account and we have logged in, we will proceed to purchase a DID number to receive and make calls. For this, we will search for a phone number providing an area code, in our case, we will use 360, which belongs to Washington.
  • The next step is to create an endpoint group. This is basically the provider trunk where we are going to connect our PBX. Here, we must provide our PBX’s public IP Address, this is because Skyetel only works with IP Authentication. Something important to take into account is that if you want to use PJSIP, you must change the port to 5062 on the endpoint definition.
  • Now that we have created the endpoint group, we will assign it to the number/DID that we have purchased. For the correct operation of incoming calls, please check and assign the correct SIP format.

Configuring VitalPBX (Outbound / Inbound)

  • Once, we have configured our Skyetel portal, it is time to configure the VitalPBX side. We will start with the trunks definition, for this, we are going to use the PJSIP protocol with the following settings:
    • Local Username: any name for your trunk, in this case, we use Skyetel
    • Remote Host: A valid outbound IP Address taken from the Skyetel documentation, in this case, we used term.skyetel.com
    • Match:  Due that the Skyetel traffic comes from random IP addresses, we will add all the valid IP addresses provided by the Skyetel documentation (52.41.52.34,52.8.201.128,52.60.138.31,50.17.48.216,35.156.192.164)
    • Require Registration: We set this option to “no” because skyetel doesn’t require a user and password authentication
  • After the trunk’s creation, we will proceed with the configuration of the outbound route as shown below.
  • Finally, we will define the inbound route with the given DID as shown below

Troubleshooting

  • Number out of service: This may happen for two reasons:
    • The first reason could be that you have not assigned an endpoint group to your number
    • The second one could be that you have not selected a valid SIP Format for your number.
  • Inbound calls not authorized: This happens when you configure an invalid port on the Skyetel side. For example, if you use PJSIP as trunk protocol, you must set the port 5062 on endpoint definition instead of port 5060

Final Notes

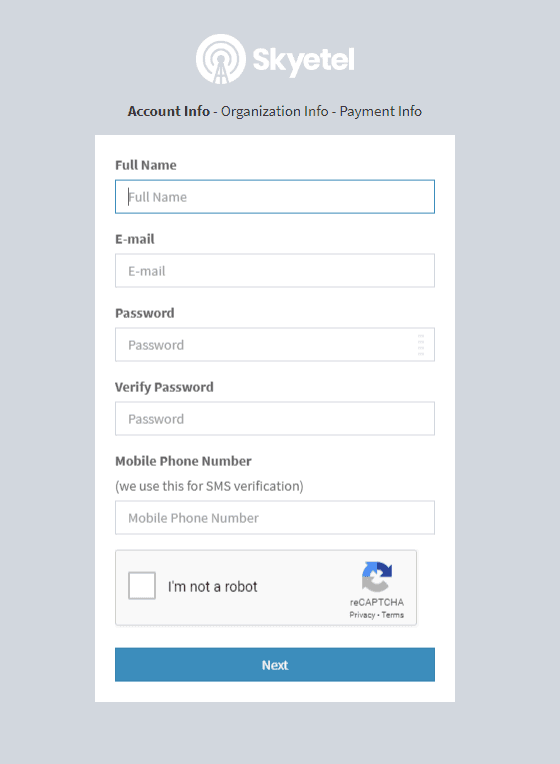
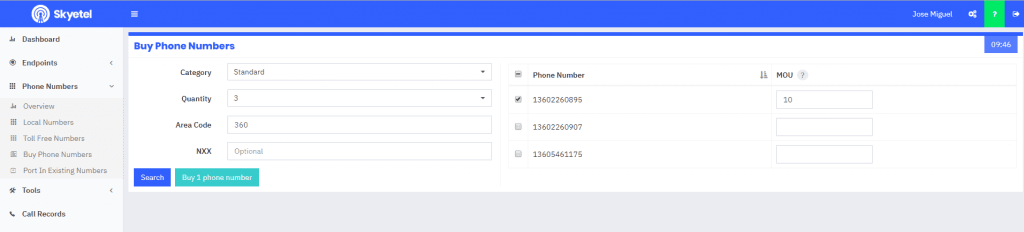
As you may notice, configuring Skyetel with VitalPBX is easy and fast. Moreover, taking into account that Skyetel portal is very intuitive, simple, and organized.

We want to give special thanks to the Skyetel team who provided us with an account for testing purposes and their support to carry out this post.

Learn more about VitalPBX, our services and how we can help you achieve your goals in our official website.

Our Latest Post