Telnyx SIP Trunk with VitalPBX: Reliable guide on how to configure

VitalPBX Telnyx Integration
Today we are going to talk about another VoIP provider. Some time ago we talked about Twilio, and today it is the turn for Telnyx, one of the providers that have become popular, and is even one of the sponsors of the IT Expo that celebrates Digium year after year.

Read our tutorials and guides on how to implement new tools and technologies for your business with VitalPBX here.

  • The first step we have to do is create a Telnyx Account and Log in to it. By default, Telnyx gives us $10 of credit, so, we will be able to purchase a number to make & receive calls.
  • After logging in, the first thing we have to do is to purchase a number. We can search numbers by region & features.
  • The second thing we are going to do is create a connection,  which would be the trunk. We can select multiple types of authentications. For this Lab, we are going select “credentials” as the authentication method.
  • After we’ve created our connection, we will go back to the numbers section and assign the connection to the number(s) that we have purchased previously.
  • To finish the configuration in our Telnyx account, we will configure our outbound profile to enable outbound calls.

Configuring Trunk on VitalPBX

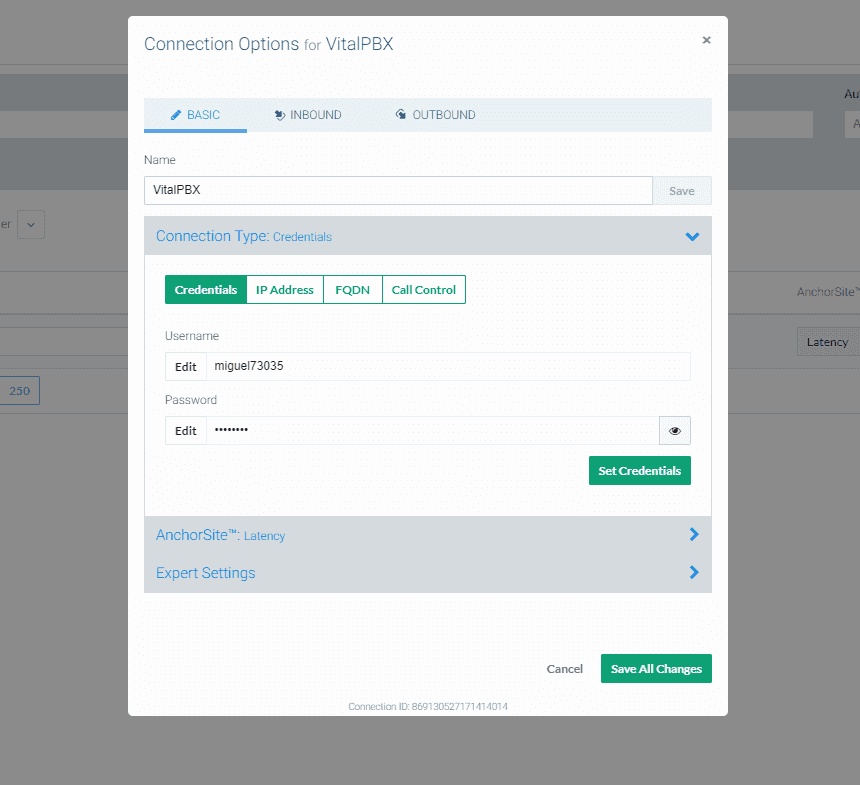
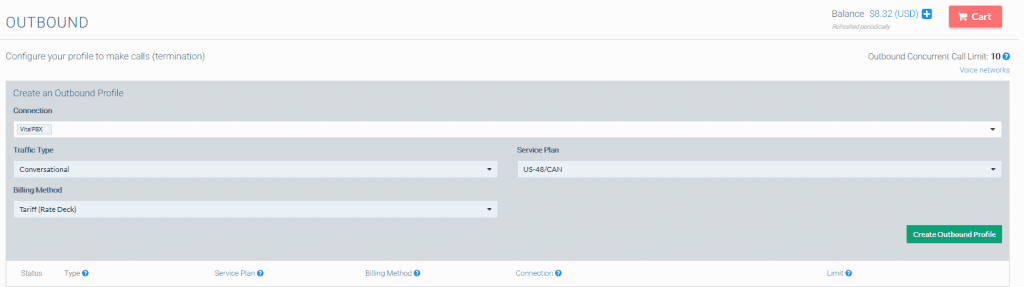
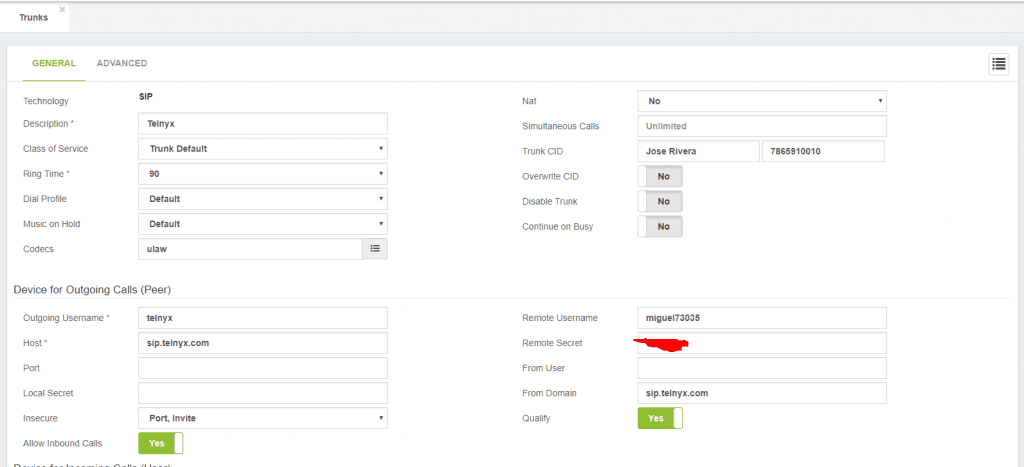
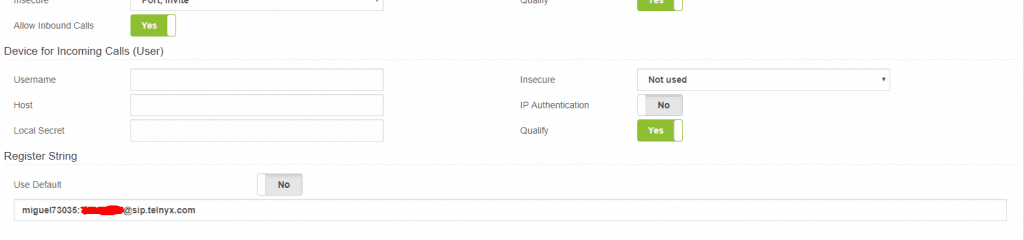
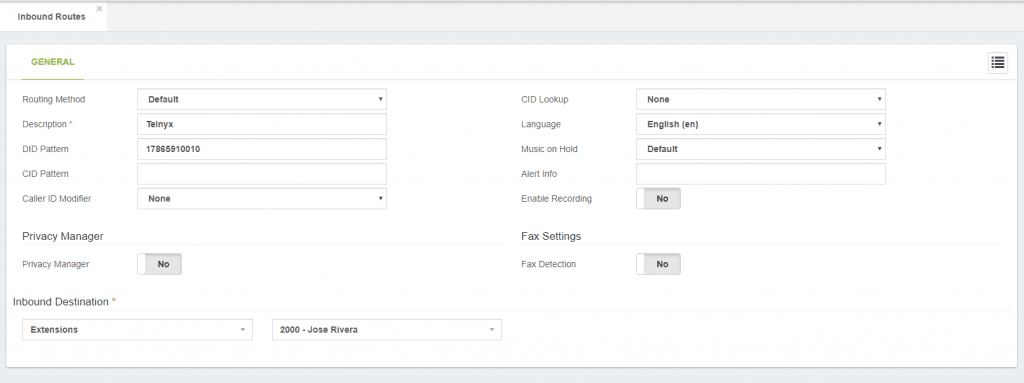
As shown in the previous image there are very few fields to configure. We will explain the fields need to configure the trunk.

  • Host: Address for all SIP communications (inbound and outbound)
  • Remote Username: Username to authenticate your trunk with the remote server. This username has been taken from the connection that we’ve created in the Telnyx Portal
  • Remote Secret: Password to authenticate your trunk with the remote server. This password has been taken from the connection that we’ve created in the Telnyx Portal
  • From Domain: Same as host, it is required for proper authentication with the remote server.
  • Trunk CID: We must use as the caller id number one of the numbers that we’ve purchased previously. Don’t forget to enable the field “Overwrite CID” to send the right caller ID.
  • Register String: Another thing we have to configure in the trunk is the register string. This is needed to allow incoming calls; The register string has the following format your_user_name:your_password@sip.telnyx.com

Outbound Routes Configuration

Inbound Routes Configuration

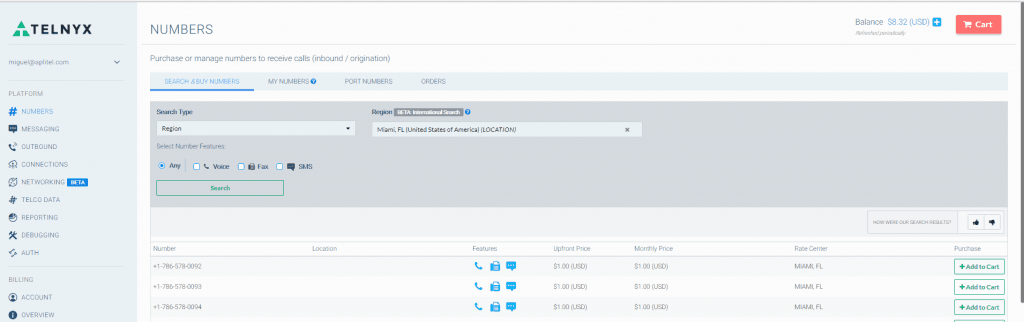
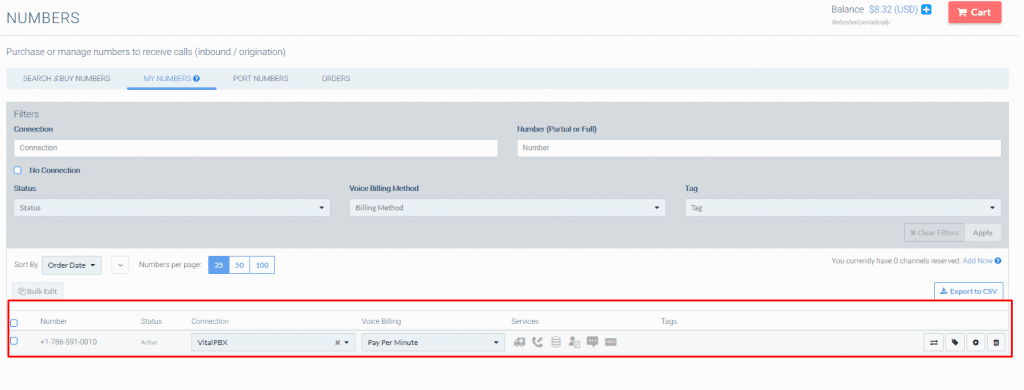
As the DID we will use the number that we purchased previously.

Conlusion

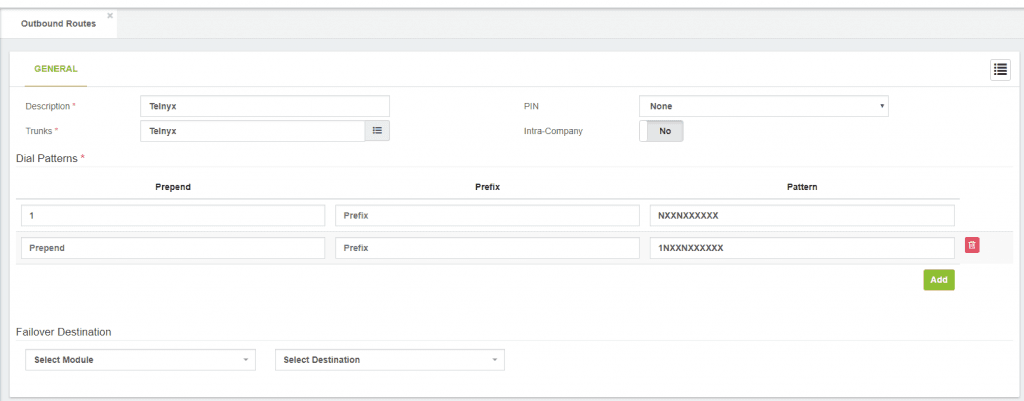
As you can see, configuring a Telnyx SIP Trunking with VitalPBX is easier and fast. In addition, Telnyx gives us some credit so that we can test all its benefits before we choose it as our VoIP provider. Learn more about VitalPBX, our services and how we can help you achieve your goals in our official website.

Our Latest Post