
Uncategorized
Exciting Product Updates to Enhance Your Communication Systems: 4.1.0 R2
We’re thrilled to share a series of updates and improvements we’ve rolled out to ensure that your experience with our communication solutions is not only


Today we are so glad to deliver a new tutorial about how to integrate one of the most rock-solid VoIP providers. We are talking about VoIP.ms, a wholesale VoIP provider with over 80,000 customers that offers call origination and termination throughout the United States, Canada, and select international locations.
Before starting the tutorial, we would like to especially thank the VoIP.ms team for providing us with an account to perform all the required tests for this integration.
Also, we would like to mention that we already have a tutorial talking about how to integrate VoIP.ms using SIP and VitalPBX 2, however, we would like to update the tutorial using PJSIP, and VitalPBX 3, and this is why we are creating this new blog post.
After you sign in to VoIP.ms customer’s portal, the first thing we will see in the portal home is our account information.
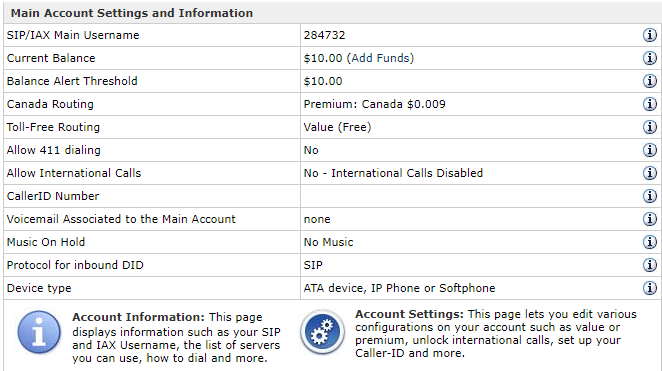
From here, we will get the trunk username, and the password will be the same that we use for login into the portal.
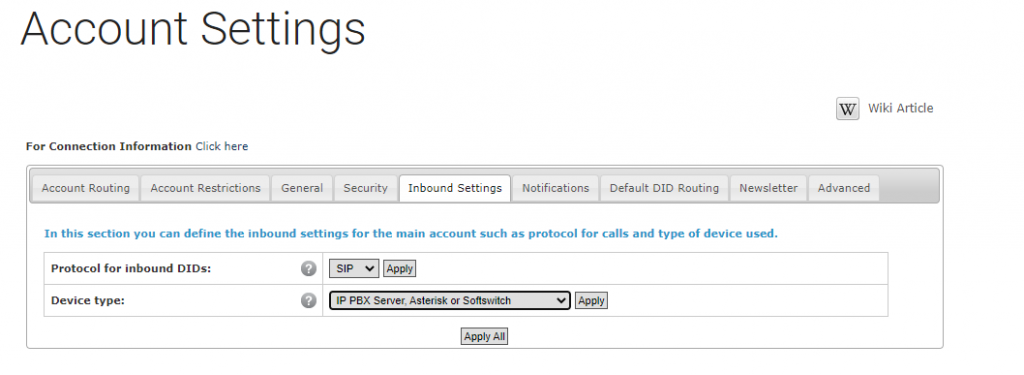
Now, to make our trunk work correctly for incoming calls we will need to change the device type to “IP PBX Server, Asterisk or Softswitch”; For this, we need to go to the account settings and then go to the “Inbound Settings” tab, change the device type to the right value, and finally click in the “Apply” button.
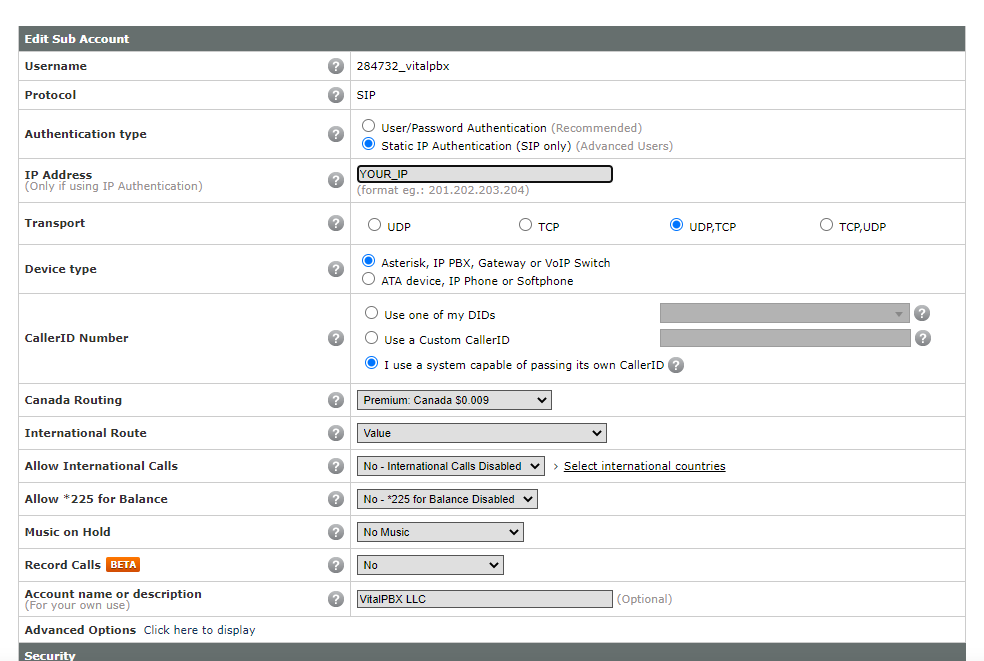
Something that you need to have in mind is that if you would like to use IP authentication instead of username and password, you will need to create a sub-account, so, for this, we will need to go to the “Sub Accounts” menu, and click on the item “Create Sub Account”.
Here, we will configure the following parameters:
The rest of the parameters can be left with the default values or you can change them according to your needs.
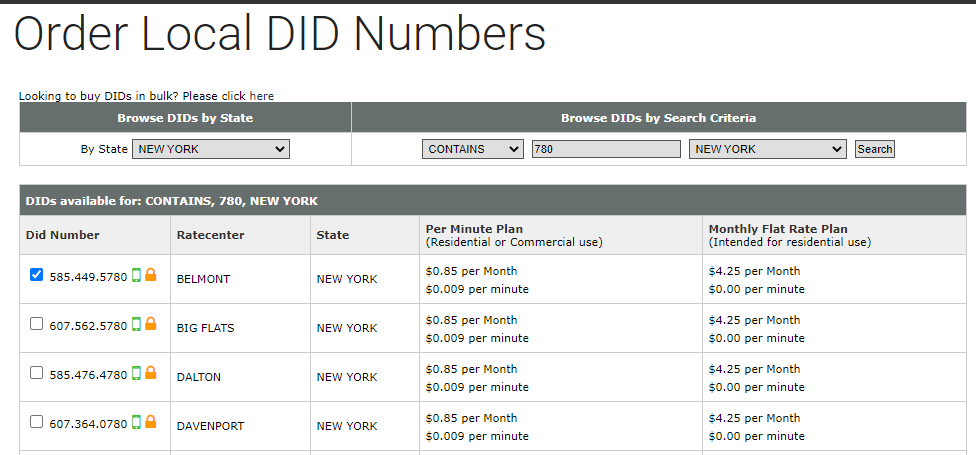
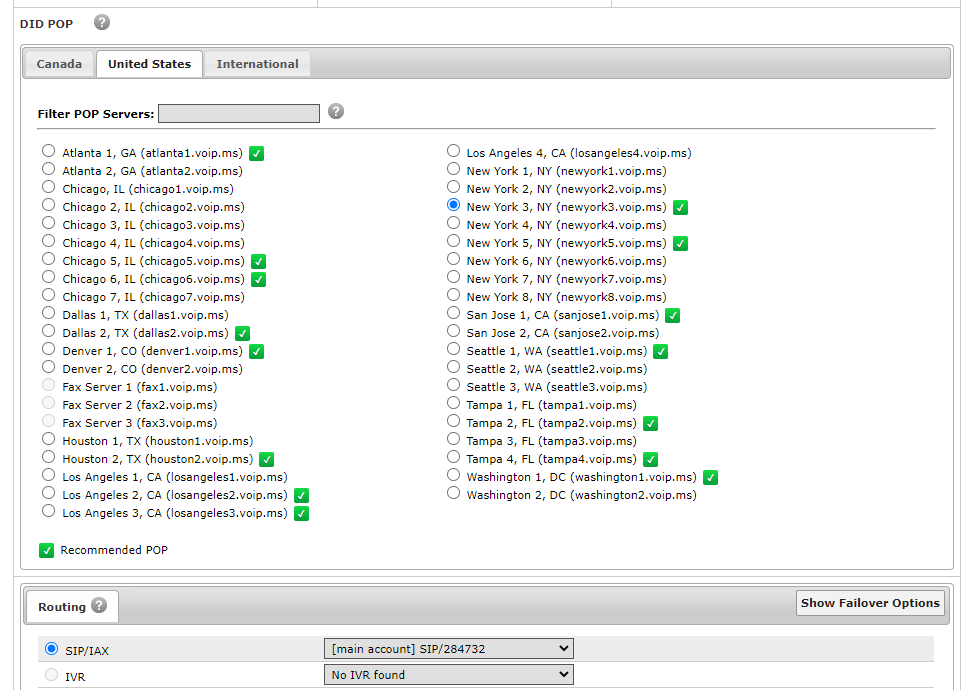
To finish the portal configurations we will need to purchase a DID number for receiving incoming calls. To purchase our number we will need to go to the “DID Numbers” menu, then select the sub-item “Order DID(s)”.
Once there, you will be able to select between different types of numbers. In our case, we will select Local Numbers from the United States.
After completing the search filters, a list of available numbers will appear; You can select any of them.
After selecting the number, there are a couple of options you will need to configure according to your needs, but, the most important are:
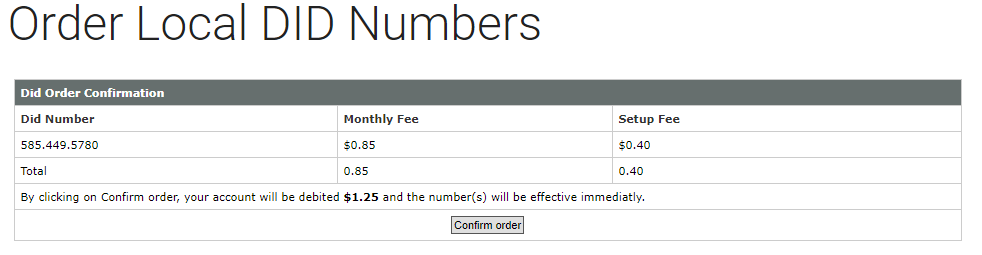
Once you have configured the DID settings, you can hit the “Order Now” button. You will be redirected to the confirmation page, and if everything looks good, then, you can hit the “Confirm Order” button.
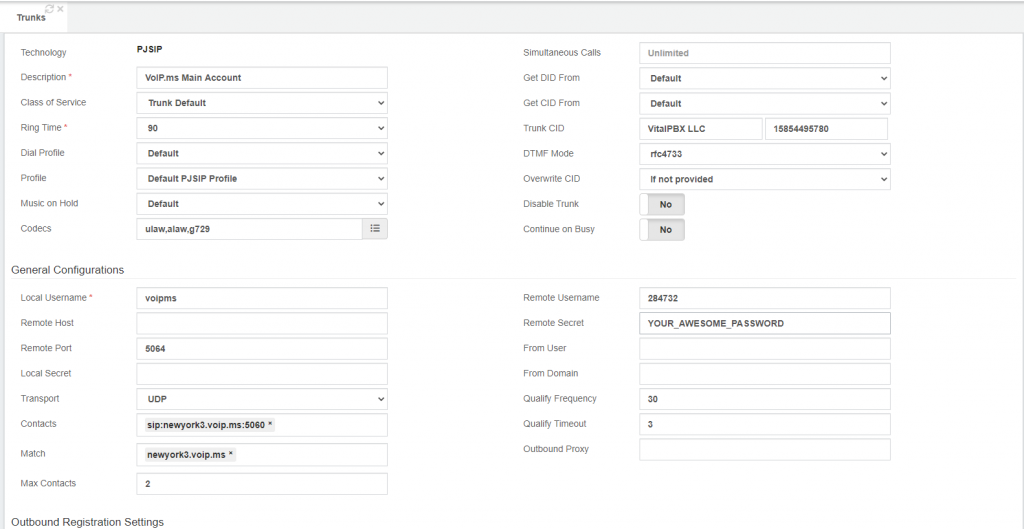
Now that we have configured the VoIP.ms portal, it is time to go into our PBX and create our trunk with the following parameters:
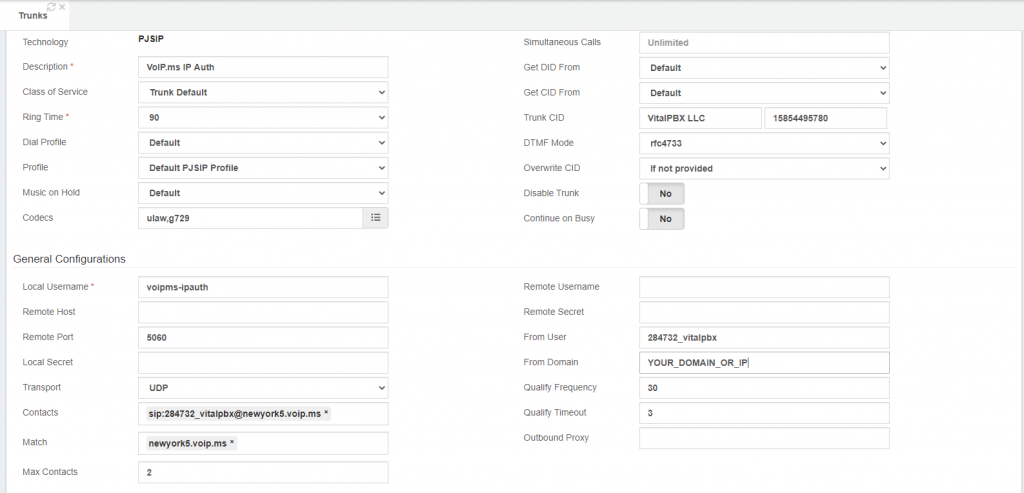
In case you would like to use IP authentication instead of a User and Password, here, we will show you how to do it.
Remember, to be able to use IP authentication you will need to create a sub-account. The main account is not capable of handling this type of authentication.
This will be the required configuration:
In order to place calls, we will need to create an outbound route pointing to the trunk that we’ve created previously. In this case, we will use the main trunk from VoIP.ms.
This will be the outbound route configuration to allow national and international phone calls.
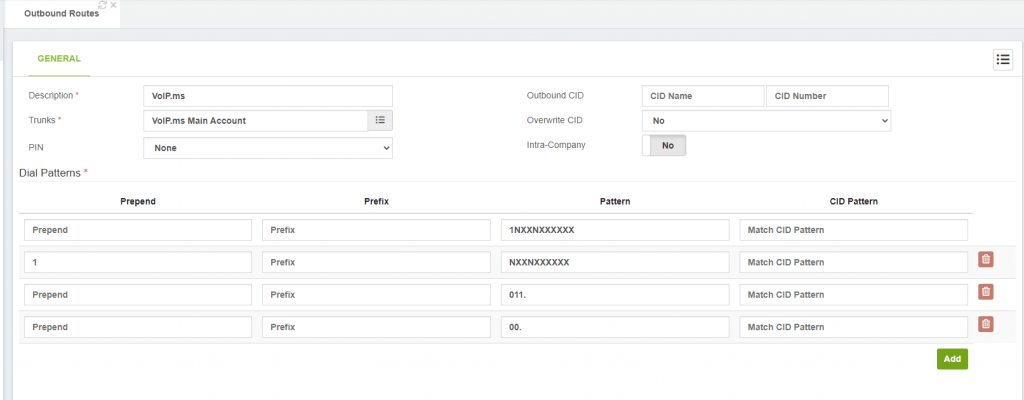
You can also configure the pattern “4443” to perform a sound quality test, and the pattern “4747” to perform a DTMF test.
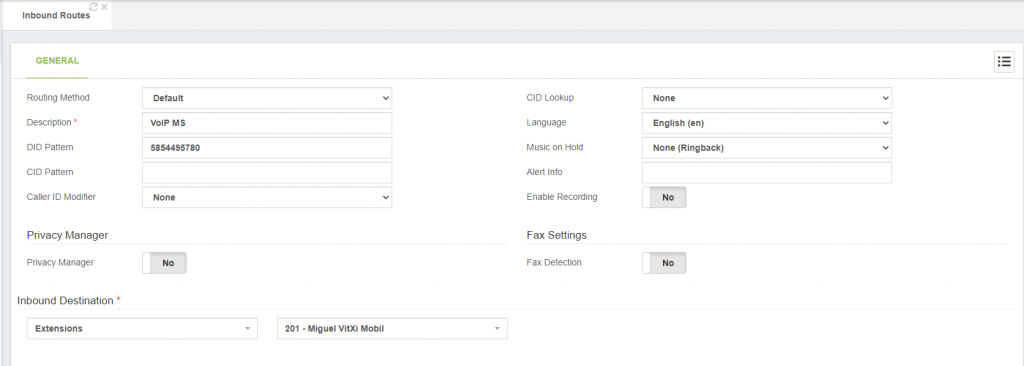
For receiving calls, the only thing we need to do is to create an Inbound Route with the number we have purchased previously, just as shown in the following screenshot.
As you can see VoIP.ms is a robust, feature-rich, and affordable VOIP provider, and most important, it is totally compatible with VitalPBX.
If you would like to learn more about VoiP.ms and its features, you can visit their Youtube channel. There, they have several videos explaining how to use their portal and configuring the different available features.
We’re thrilled to share a series of updates and improvements we’ve rolled out to ensure that your experience with our communication solutions is not only

The VitalPBX team is thrilled to announce the rollout of VitalPBX 4.1 R1, a significant update that brings cutting-edge features and improvements to your communication

PBX System Recognized for Industry Innovation Miami, Florida, 02/27/24 — VitalPBX announced today that TMC, a global, integrated media company, has named VitalPBX Unified Communications